You will need:
- 1 Empty plastic bottle (We found that smaller bottles like 500 ml work better than bigger ones.)
- 1 Cork that fits tightly in the bottle
- 1 Ball pump with a needle
- Paper or cardboard for nose cone and fins
- Scissors
- Universal glue or tape for the fins and nose cone
- Tiny screwdriver or similar tool to make a hole in the cork for the ball pump
- Stickers or acrylic paint and paint brushes for decorating
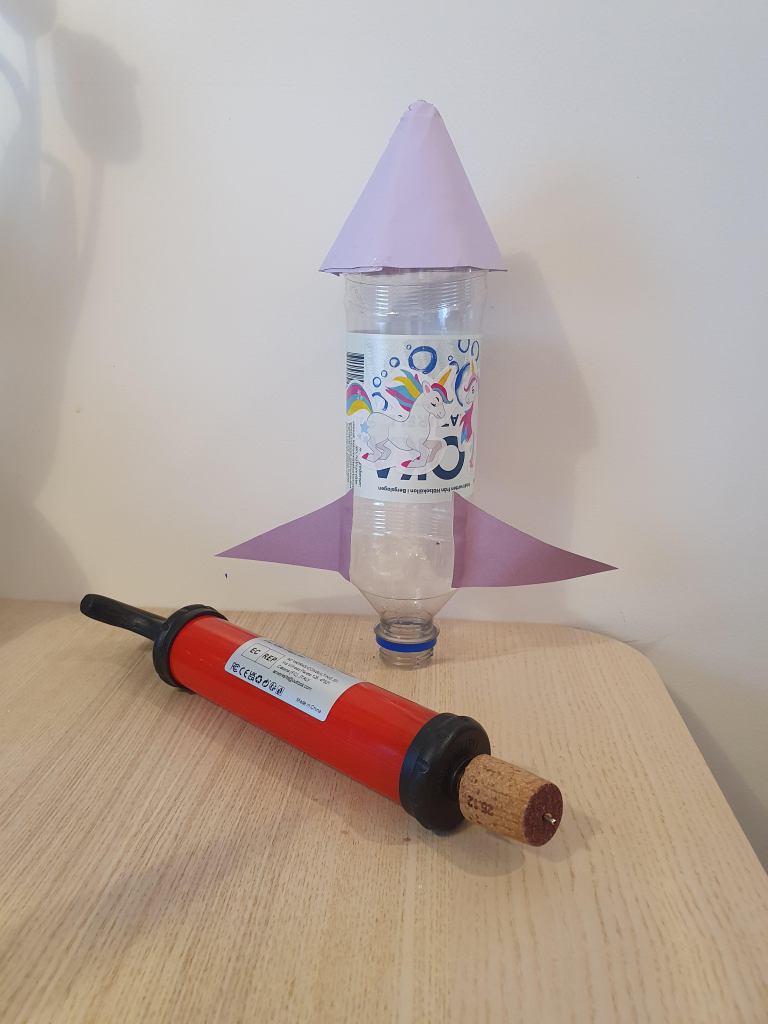
Step 1: Build the Rocket
Turn the bottle upside down.
The bottle neck will be the bottom of the rocket.
Decorate the bottle with stickers or paint it with acrylic paint. If you use paint, wait for it to dry.
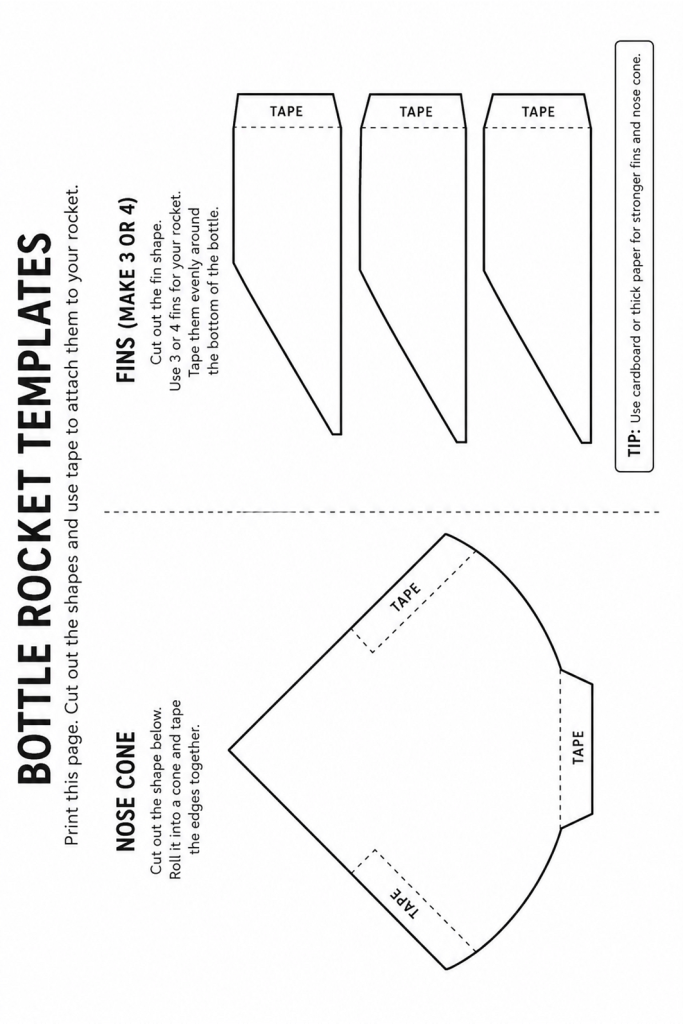
Cut the nose cone and fins from paper or cardboard. (We found that cardboard gives a more stable cone and fins.)
Glue or tape paper fins and a paper nose cone onto the bottle. Ask an adult for help if using universal glue.
Step 2: Put in the Cork
Select a cork that will fit tightly into the hole of the bottle.
Ask an adult to drill a small hole through the middle of the cork with a tiny screwdriver or a similar tool to fit the needle of the ball pump.
Push the cork tightly into the bottle opening. You can wrap it in tape to fit better if it is too small.
Step 3: Pump Air Into the Bottle
Take the rocket outside.
Place the needle of the ball pump through the hole prepared for it. It should fit quite tightly.
Point the bottle away from you and hold ONLY onto the ball pump or the cork outside the bottle. (Do NOT hold onto the bottle itself!)
Start pumping with the ball pump. You may need an adult to help with this (because it can require a lot of strength to pump the bottle completely full of air).
Step 4: Blast Off!
As more air goes inside, the pressure gets stronger.
Finally, the cork pops out and the rocket shoots away!
Why Does It Fly?
The pump pushes air into the bottle.
The air pressure builds up inside.
When the cork pops out, the fast-moving air pushes the rocket away.
The fast-moving air is an action which causes a reaction which is the rocket moving away.
This concept of action and reaction is also called Newton’s 3rd Law of Motion. This effect is also used by real rockets when they push of the ground. The main difference is that real space rockets use very strong fuels (hydrogen and oxygen) to create even more pressure and fast-moving gasses for the action part.
Safety Tips
- Always launch outside.
- Never point the rocket at yourself, other people or animals.
- Always bring an adult to assist in your launch.
- Ask an adult to help with universal glue and to make the tiny hole into the cork.
Template for fins and nose cone