
Have you ever wondered how much rain falls from the sky? Scientists use a tool called a rain gauge to measure rain. You can make your own at home or at school. It is simple and fun.
What you need
- An empty, clear plastic bottle
- A pair of scissors
- A ruler
- Sticky tape
- A waterproof marker pen
What to do
- Cut the bottle.
Ask an adult to help you cut the top part off the plastic bottle. - Mark the ruler lines.
Use the ruler and marker pen to draw lines up the side of the bottle. These lines will help you measure the rain. - Optional: Turn the top upside down.
Place the cut top of the bottle upside down like a funnel. Use sticky tape to hold it in place. - Tape the edges of the bottle. Place sticky tape around the edge at the top of the bottle. This is done because the edge is quite sharp to avoid cutting yourself.
How to use your rain gauge
- Put your rain gauge outside in an open space.
- Make sure it is not under a tree or roof.
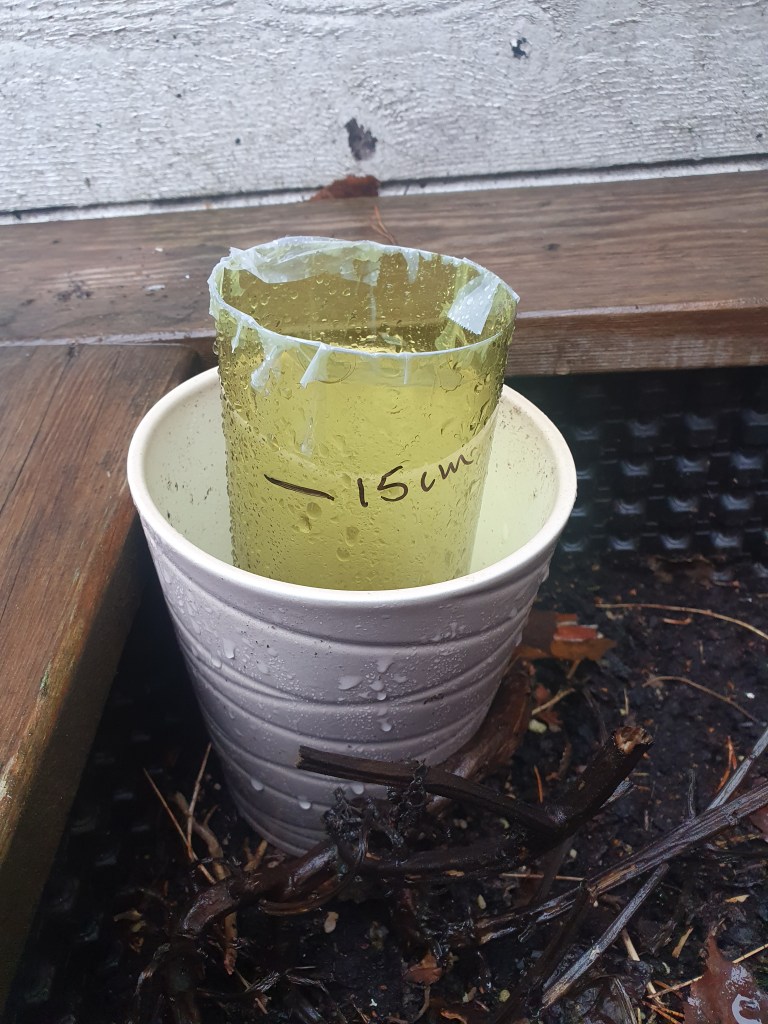
- Make sure that the rain gauge cannot easily be blown away by the wind, e.g. place it inside a flowerpot or dig a small whole where you can place the rain gauge. See image below for an example.
- After it rains, look at the water level.
- Use the ruler marks to see how much rain has fallen.
Why this is interesting
Measuring rain helps us learn about the weather and how it changes. Farmers, gardeners, and scientists all use rain gauges to understand weather and climate change better.
You can check your rain gauge every day and keep a weather diary. This turns you into a real scientist!
Example table for a weatehr diary
| Day of the Week | Type of Weather | Amount of Rainfall |
|---|---|---|
| Monday | ||
| Tuesday | ||
| Wednesday | ||
| Thursday | ||
| Friday | ||
| Saturday | ||
| Sunday |
