Wildlife Feeding Traces: What to Look For

When taking a walk in the forest in early spring you can find many feeding traces of different animals. Join us in exploring some of them.

1 Traces left on trees

Deer, rabbits and hares all feast on the bark of trees during the winter months when grass and other plants do not grow well. But they leave different clues on trees that help us tell them apart.

Deer are quite tall, so they can reach higher parts of a tree. When deer eat, they often tear the bark with their mouths. This can leave rough, jagged edges on the tree. You might also see damage higher up, about as tall as your chest or even above your head. In addition, roe deer and red deer normally pull of strips of bark, while fallow deer are more content to nibble.

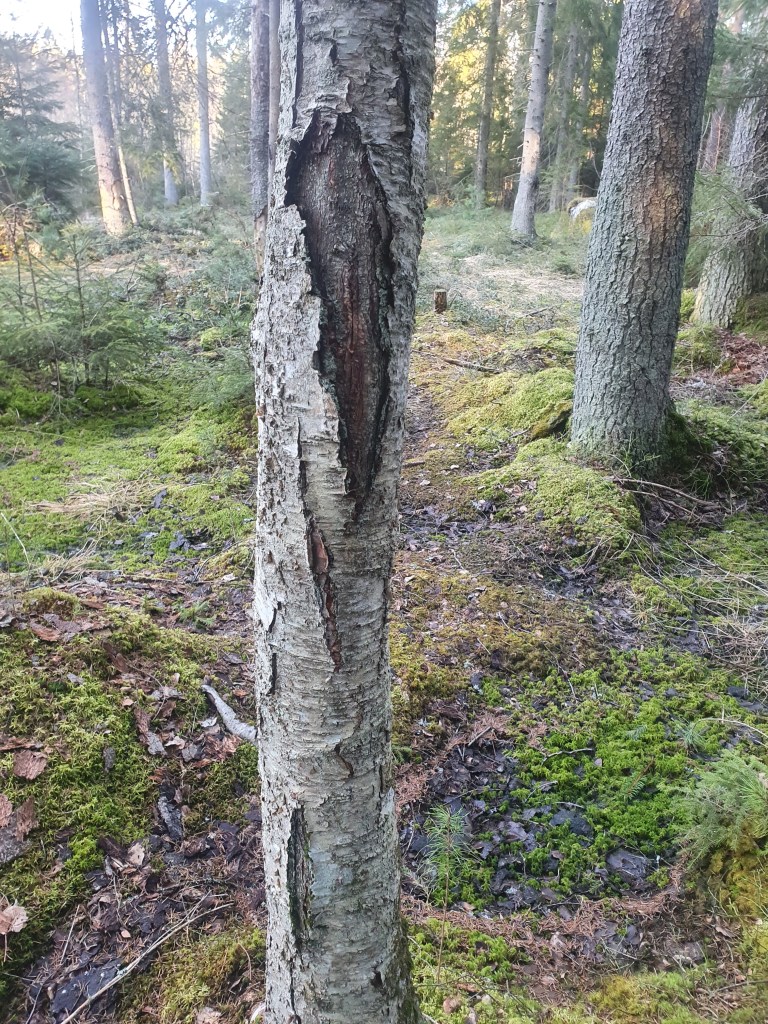
The image below shows a tree which had some of its bark most likely stripped of by a roe deer during winter. The dark colour shows that the tree has begun to heal in this part.

Rabbits and hares are much smaller than deer, so they can only reach low parts of a tree. They have very sharp front teeth, and they nibble neatly. This means the bark or twigs they eat often look cleanly cut, almost like they were snipped with tiny scissors. The damage is usually close to the ground.

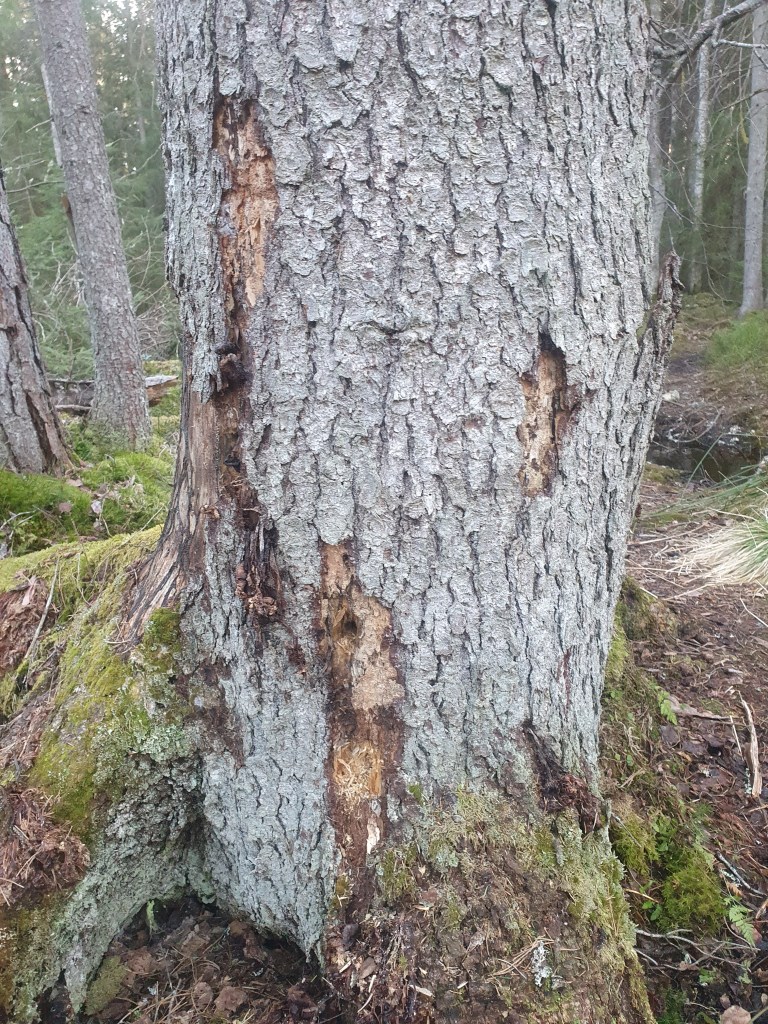
This image shows the damage in the bark close to the ground which means that it may have been eaten by a rabbit or hare.

In summary, if the tree is damaged high up with rough edges, it was likely a deer. If the damage is low down with neat, tidy bites, it was probably a rabbit or a hare.

2 Traces left by wild boar

Wild boar leave very noticeable signs when they search for food in the forest.

They use their strong snouts to dig in the ground. This is called “rooting.” When they do this, they turn over the soil looking for roots, insects, worms, and bulbs. The ground can look messy, with patches of earth all churned up, almost like it has been ploughed.

You might also see small holes and uneven ground where they have been digging. Sometimes large areas are disturbed, not just one spot.

Wild boar can also leave footprints. Their tracks look a bit like a deer’s, but they are rounder and wider. If the ground is soft, you may see many of these prints together.

So, if you see torn-up soil, lots of digging marks, and hoof prints in the forest, a wild boar has probably been there looking for food.

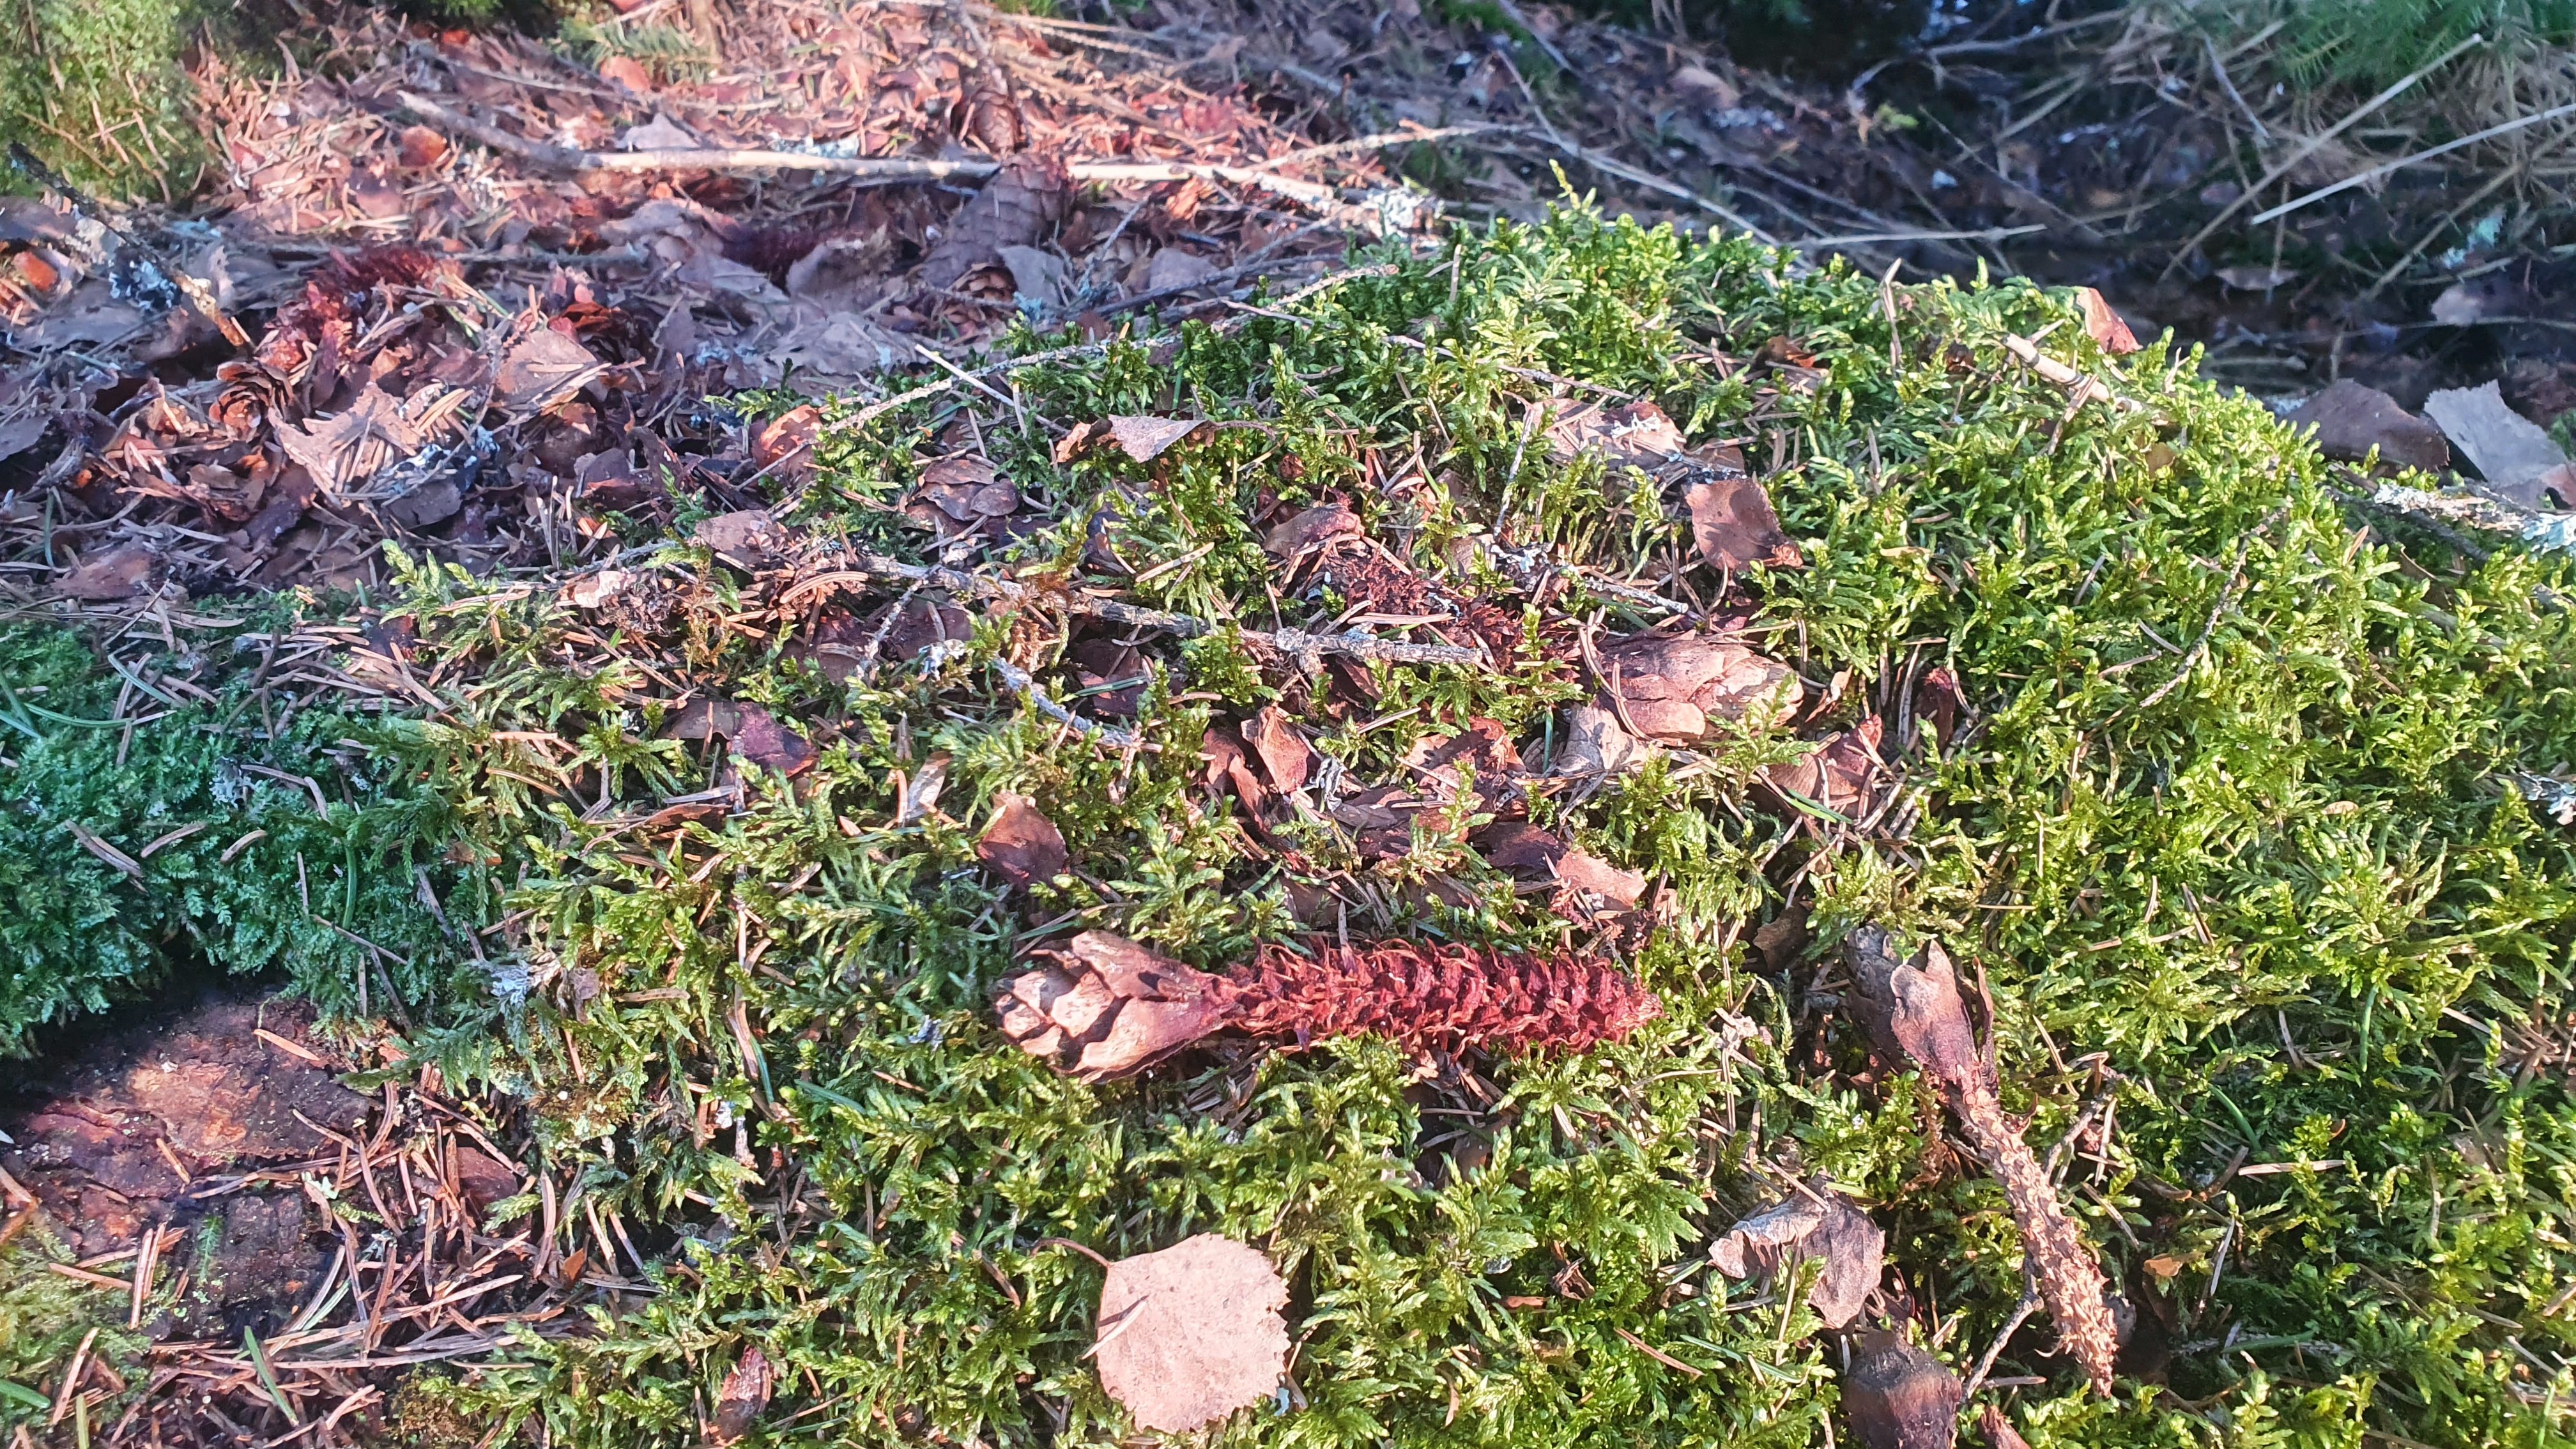
The image below shows a small area in a forest where wild boar have rooted for food.

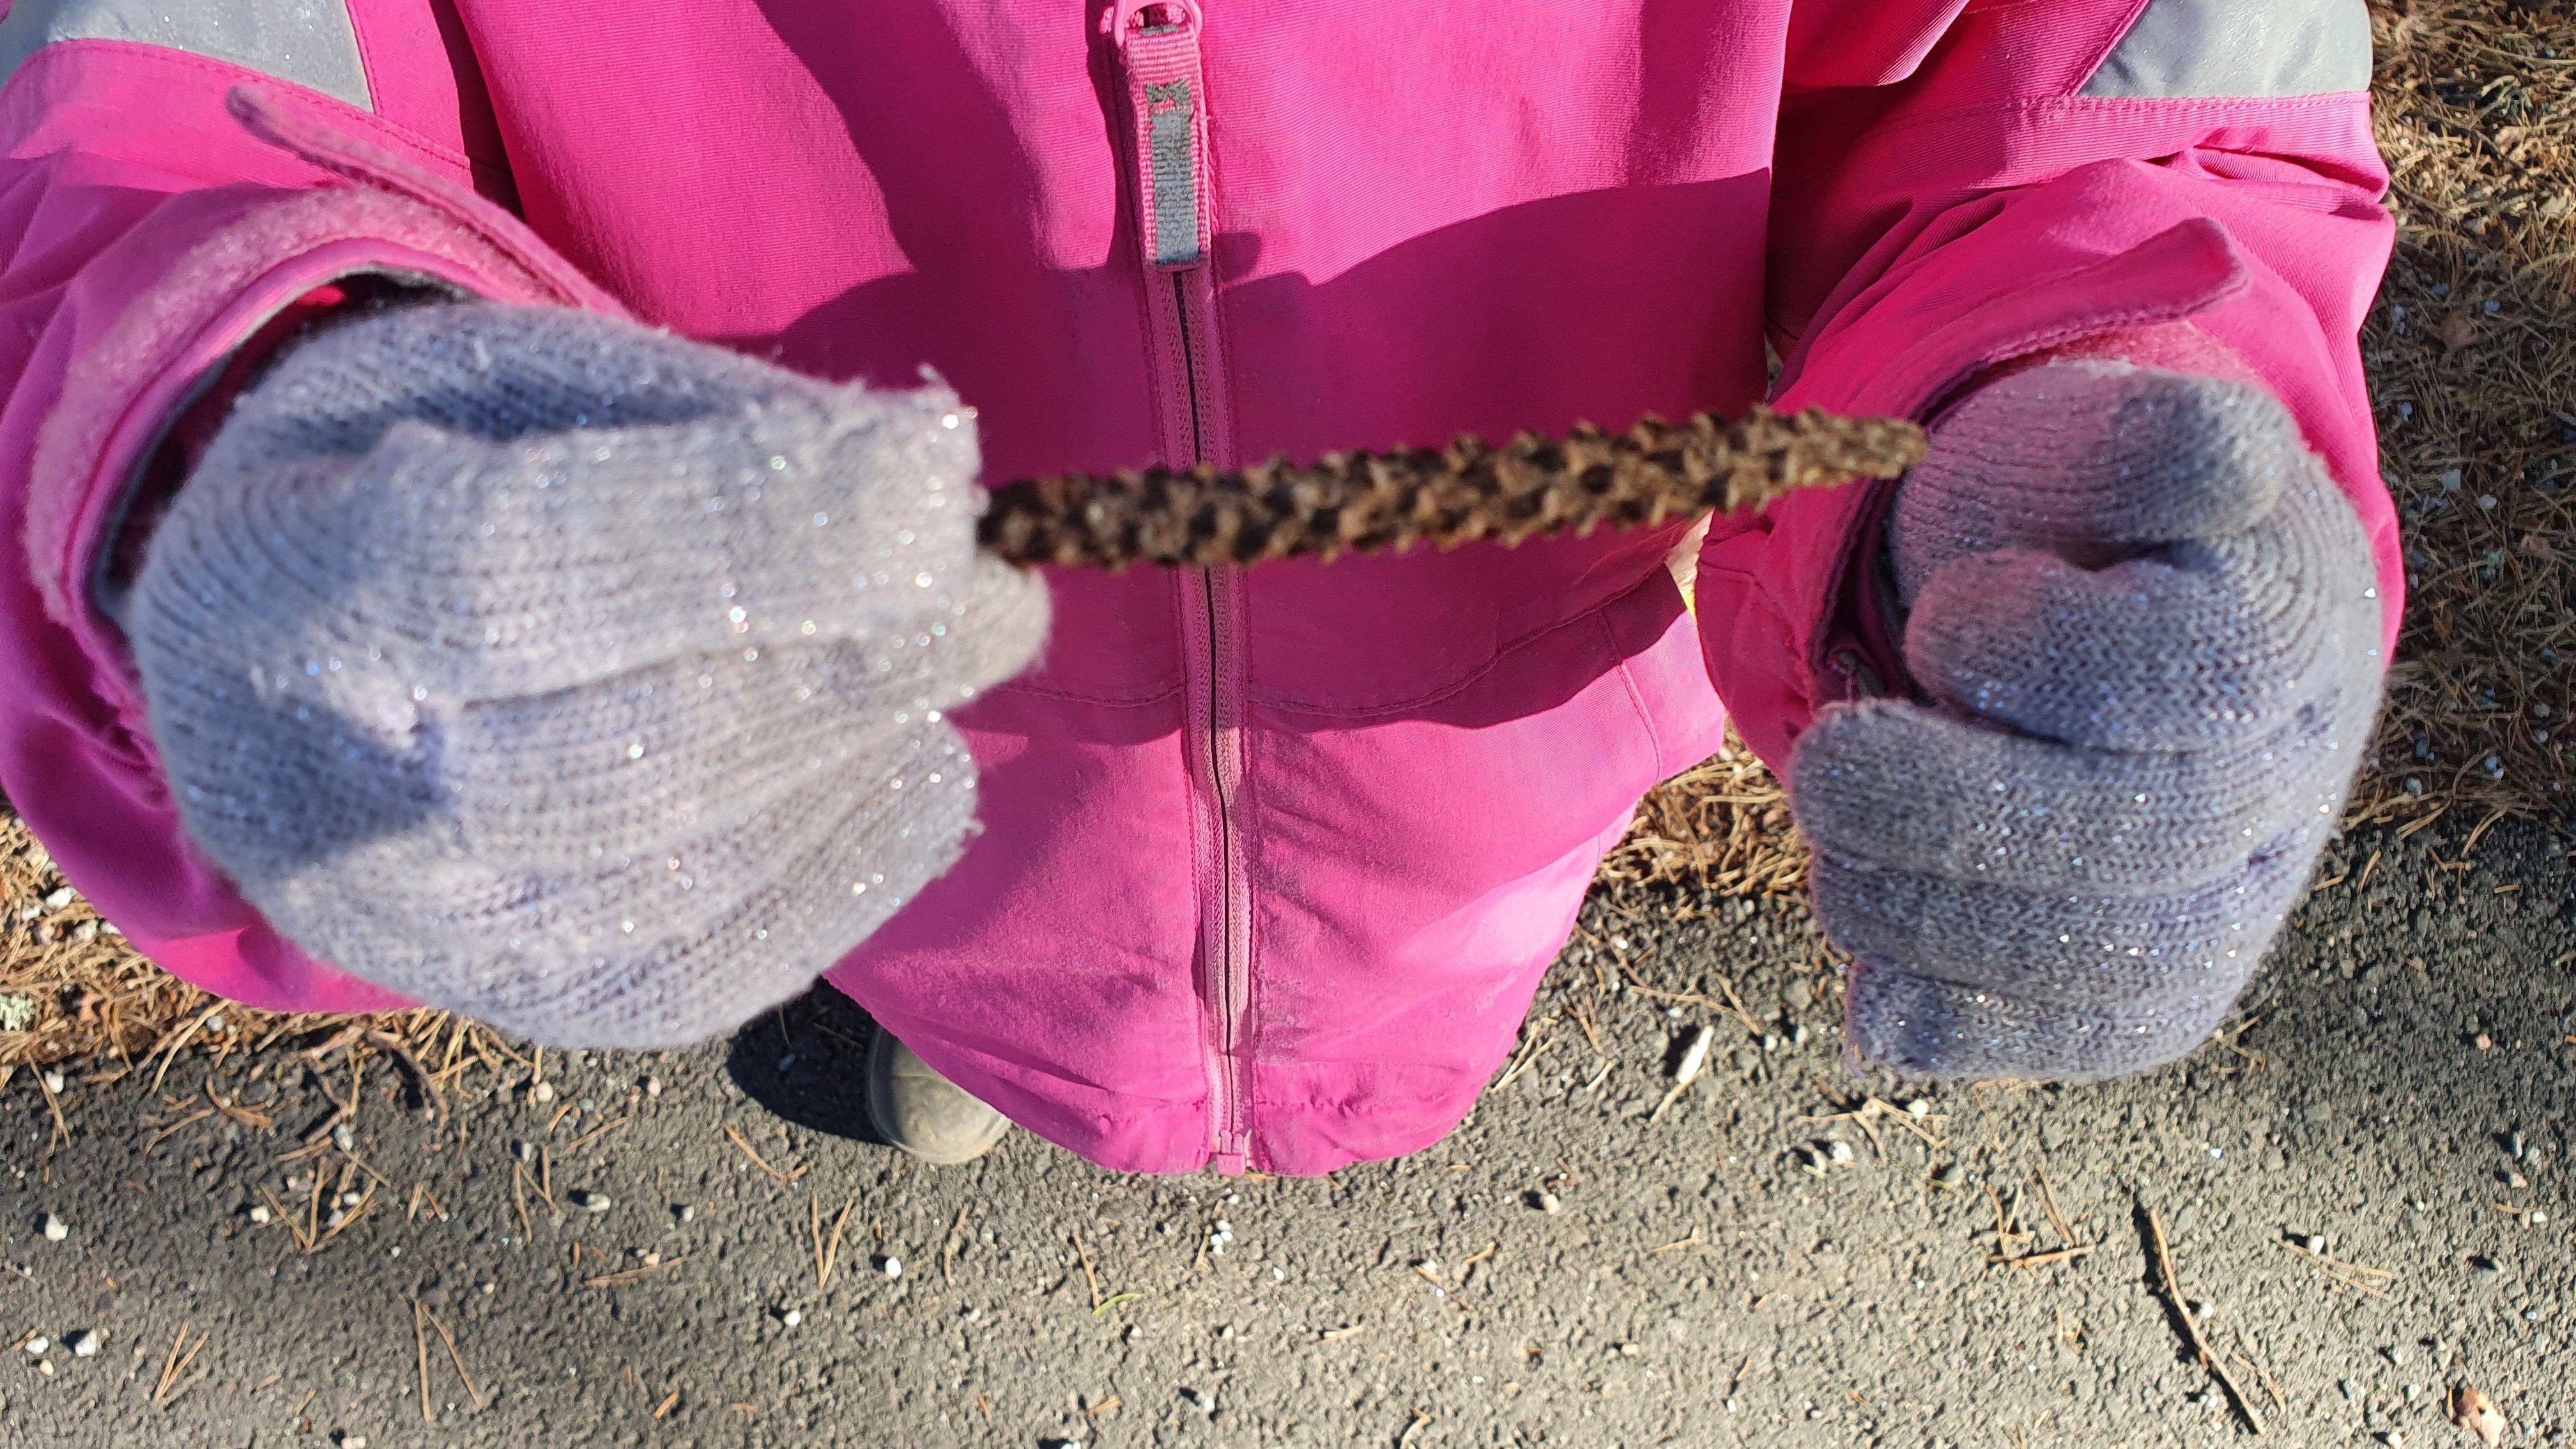
3 Traces left on gnawed cones

In the forest, you can often find eaten spruce cones on the ground. By looking closely, you can tell which animal has been feeding on them.

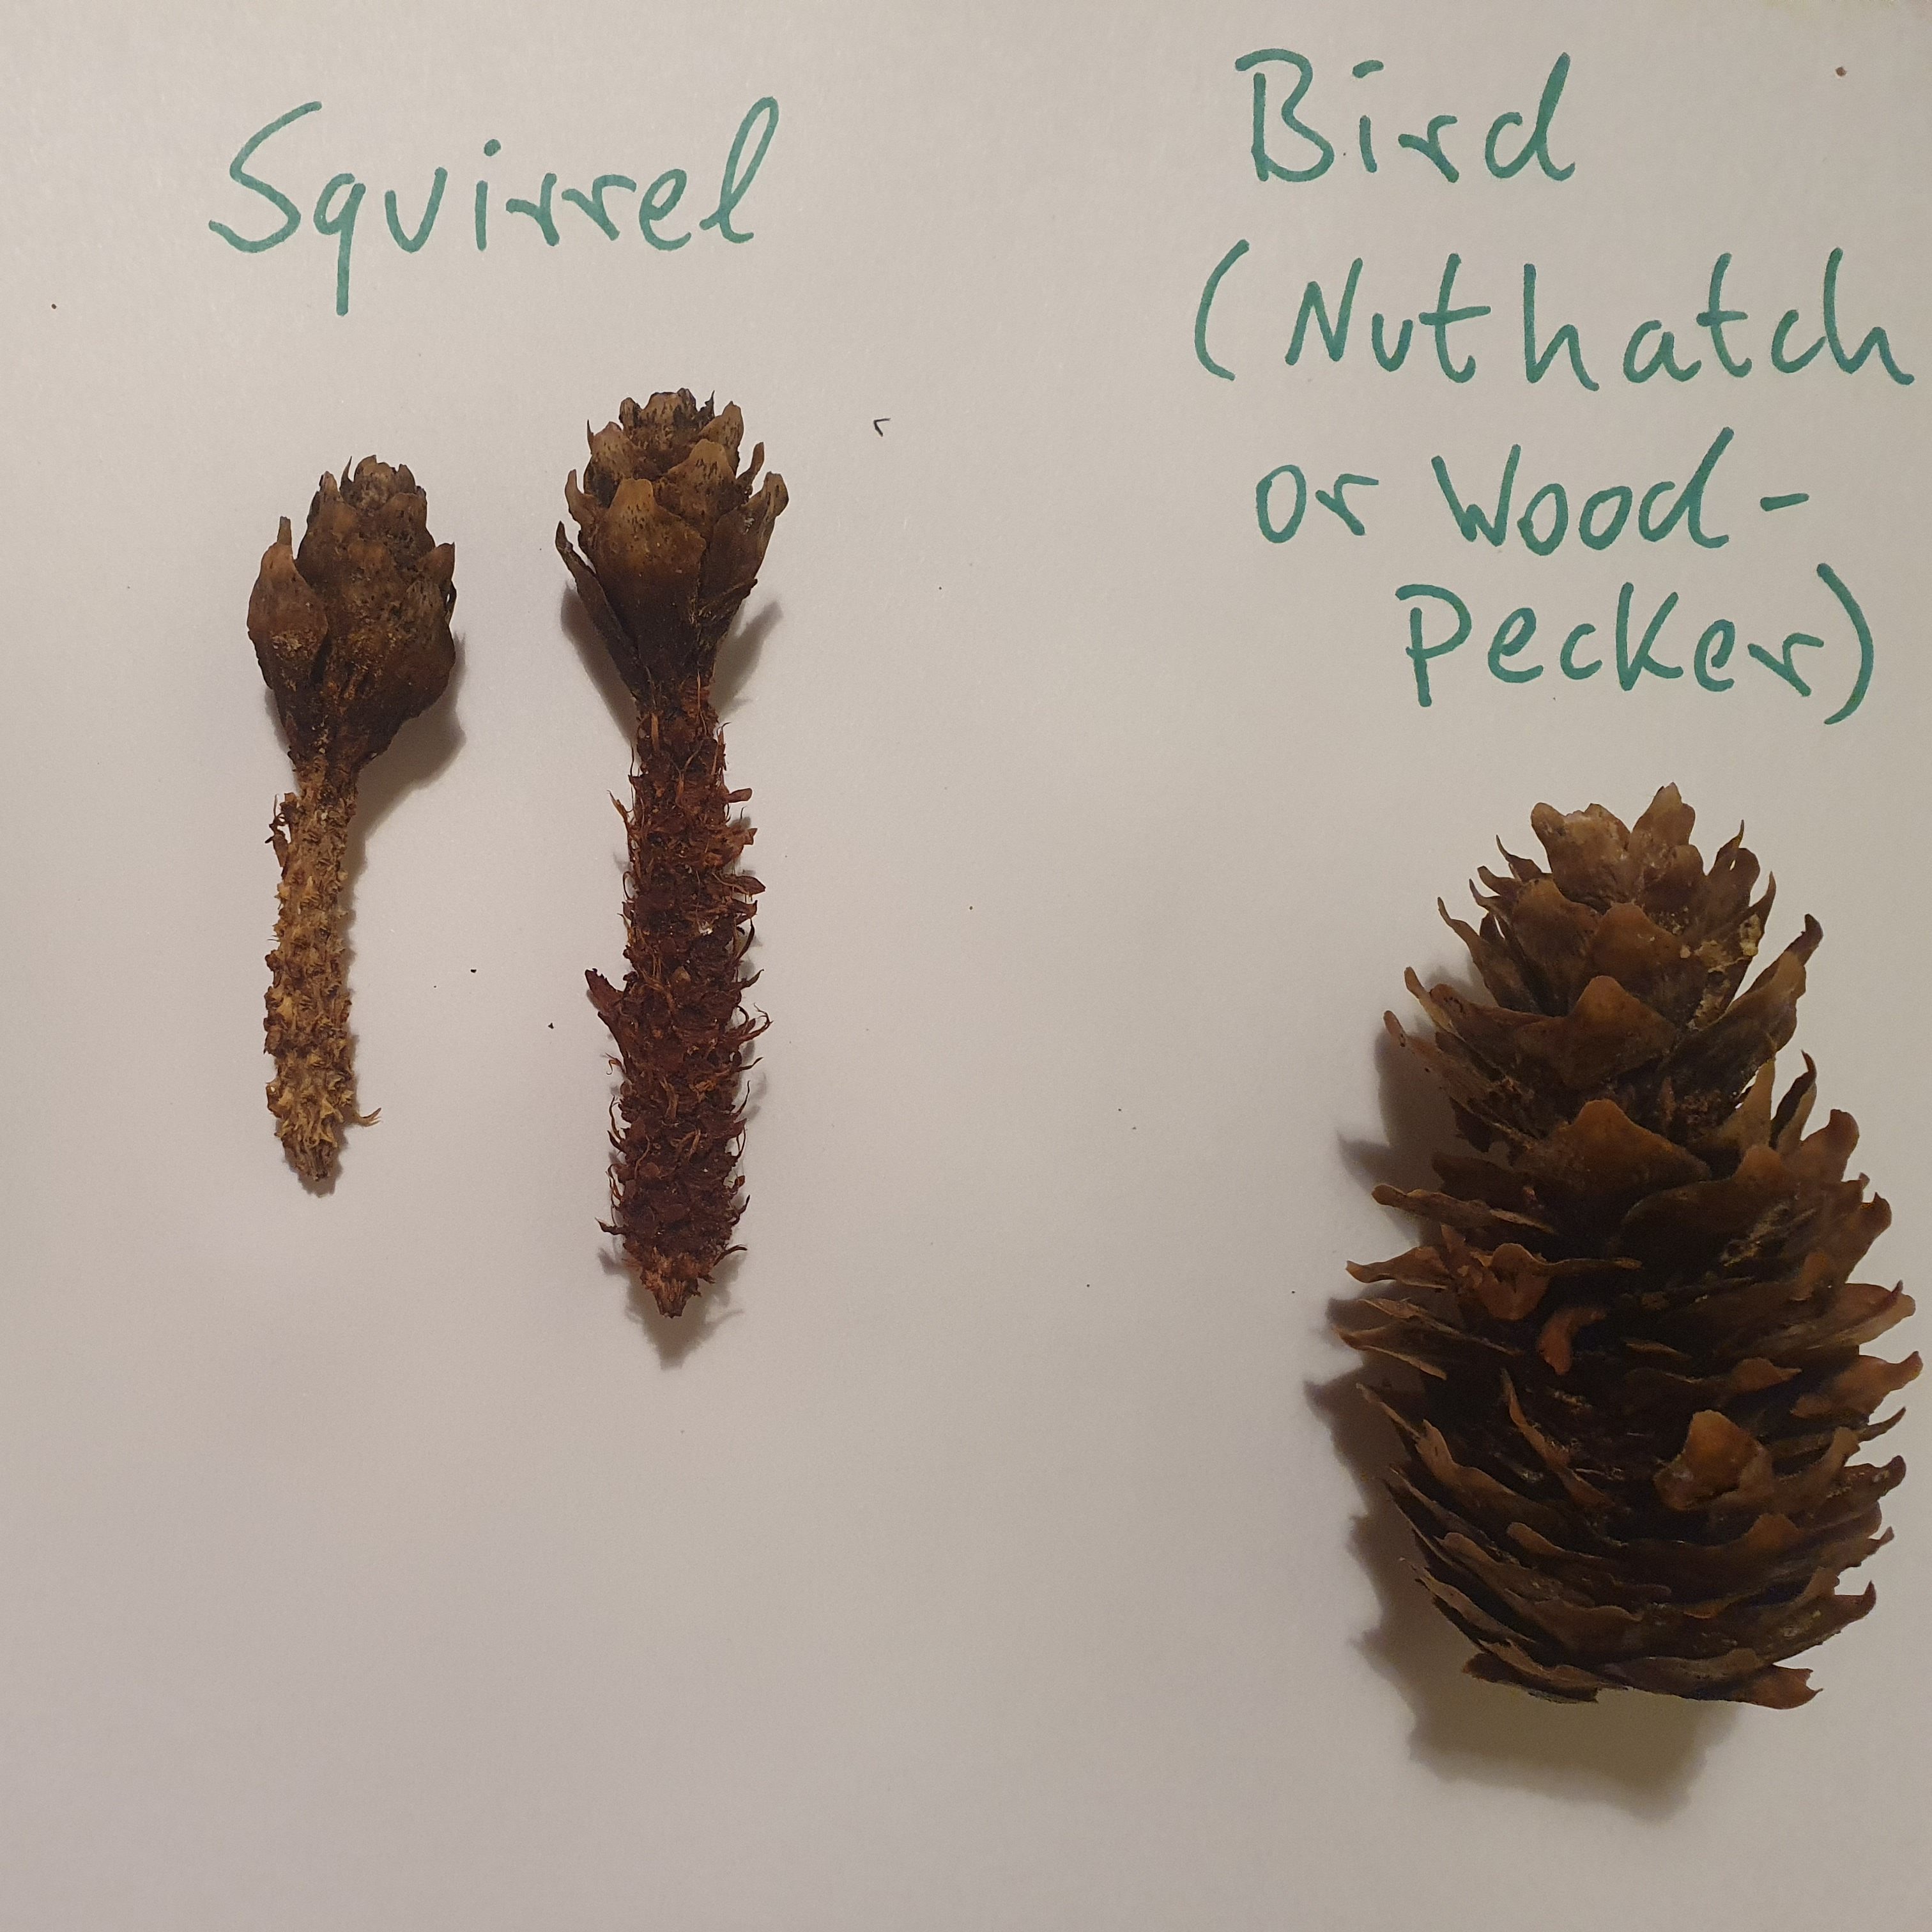
A squirrel leaves quite a tidy cone behind. It holds the cone and nibbles off the scales one by one. When it is finished, mostly the middle part, called the core, is left. Squirrels normally leave some scales at the tip of the cone where they have been holding it. The image below shows a cone left by a squirrel under a tree. You can even see some scales around it on the ground.

A wood mouse eats in a different way. It strips the cone of every last scale and only the clean core is left, which may almost just look like a stick which can be seen in the image below.

Birds like woodpeckers and nuthatches have a special way of eating cones. They often wedge the cone into a crack in the bark of a tree to hold it still. Then they peck at it to get the seeds out. The cone may look pecked and broken, with rough marks. Sometimes you can even find the place in the tree where the cone was held, called a “cone anvil.”

So, a clean, stripped core is likely from a wood mouse, a cone with scales left at the top from a squirrel and a pecked cone, often near a tree crack, from a bird like a woodpecker or nuthatch.

Solubility Experiment

Background

The general ruls of solubility is that ”like dissolves like”. This means that polar solvents like water will dissolve more polar compounds such as ionic compounds like salts (e.g. sodium chloride). Less polar solvents such as organic solvents (e.g. propanone) will dissolve non-polar compounds such as plastics.

Nail polish contains non-polar compounds. Nail polish remover is made from propanone, a non-polar solvent which will dissolve nail polish, but not the polar ionic compound sodium chloride.

Method

1. Collect two watch glasses.
2. Brush some nail polish into the middle of the two watch glasses and let it dry.
3. Collect one beaker with water and fill a second beaker with propanone or nail polish remover.
4. Drop ¼ spatula of salt into the beaker containing water and stir. Observe what happens.
5. Drop ¼ spatula of salt into the beaker containing propanone and stir. Observe what happens.
6. Drop water onto one watch glass with nail polish and watch what happens.
7. Then drop some propanone or nail polish remover onto the 2nd watch glass with nail polish and watch what happens.

Results Table

Create your own results table.

Analysis

1. Explain your results.
2. What are weaknesses of the experiment?
3. How could you improve the experiment?

Refraction in a Feather

You will need

  • 1 Candle or tea light
  • 1 Large bird’s feather
  • Matches
  • Fire-proof surface, for example a ceramic plate

What to do

  1. Light the candle.
  2. Stand about 1 metre away from the candle.
  3. Hold the large bird’s feather in front of one eye and watch the candle through the feather. Make sure you look through one of the white or gray coloured parts of the feather.
  4. If you have positioned the feather correctly, the flame will appear to be multiplied in an X-shaped arrangement. You may have to shift the feather around a bit to find the best position to peak through and observe this.

Background

The X-shaped pattern of the flame is produced when the light passes through the fine vanes and barbs of the feather. The light is bent and changes directions as it passes through them. This bending of light is called “refraction”. The flame appears many times because your eye is looking through several slits at the same time.

You can watch a video of this experiment here:

Make Your Own Ice Cream

You will need:

  • Drinking chocolate powder
  • Salt
  • Cream
  • Ice cubes
  • Tea towel
  • Table spoon
  • Glass
  • Bowl
  • Milk

What to do:

  1. Mix one table spoon of drinking chocolate powder, two table spoons of milk and one table spoon of cream in the glass.
  2. Stir vigorously to dissolve the chocolate powder.
  3. Put some ice cubes in the bowl and sprinkle a lot of salt over them.
  4. Place the glass of ice cream mixture in the large bowl, on top of the salted ice cubes.
  5. Build up more layers of ice cubes and salt around the glass.
  6. Place the tea towel over the bowl for insulation. Leave the ice cream mixture to set for an hour.
  7. Take the glass out of the bowl and taste your homemade chocolate ice cream.

Background

Adding salt to ice will lower the temperature of the ice even more. This is a good way to freeze things without the freezer.

You can watch a video of this experiment here:

Chromatography at Home

You will need:

  • Kitchen roll
  • Felt tip pens
  • Water
  • Bowl or cup
  • Scissors

What to do:

  1. Cut a long strip from one sheet of kitchen roll. It should be 2 cm or 1 inch wide.
  2. Choose one felt tip pen and draw a big dot at the bottom of your kitchen roll strip. IMPORTANT: Do not draw the dot all the way at the bottom, leave about 2 to 3 cm from the bottom to the dot.
  3. Pour some water into a bowl or cup.
  4. Place the bottom of your kitchen roll strip in the water and watch what happens. IMPORTANT: When you do this, the dot must be above the water.
  5. Repeat the method with other felt tip pens.

Background

The inks in felt tip pens are made by mixing different colouring materials, called “pigments”. We can use chromatography separate the different colours because some are soaked up the kitchen roll faster than others.

The reason is that the different pigments have different solubilities in water. The further the colour travels, the more soluble it is. Less soluble colours stay at the bottom.

You can watch a video of this experiment here:

Make Things Sink, Then Float

You will need

  • Modelling clay or blue tag
  • Marbles (if you don’t have marbles, use small rocks)
  • Water
  • Glass bowl or a large glass jar

What to do

  1. Fill the glass bowl or jar with water.
  2. Drop the marbles into the water. They quickly sink to the bottom. Roll the clay into a ball and drop it into the water as well.
  3. The clay also sinks like the marbles.
  4. Remove the marbles and the clay ball from the water.
  5. Flatten the clay as much as possible, then shape it to make a boat and place it into the water. Now it floats!
  6. Add one marble as a cargo. The boat settles lower, but still floats.
  7. Add more marbles, one at a time. How many can you add before your boat sinks?

Background

Large ships float on water, even though they are very heavy.  However, a small object like a marble sinks. The mass of the object does not matter. Whether or not an object floats depends on its density and how much water it “displaces”, or pushes aside.

When the clay is shaped like a ball, it does not displace much water and it sinks. When shaped like a boat, the clay has a bigger area and displaces more water which makes it float. When adding your cargo of marbles, the boat settles lower to displace more water and carry the extra mass. When adding too many marbles, the boat will settle below the water line and sink.

This is important for ships. Too much cargo can lower them too close to the water line and make them vulnerable to sinking.

You can watch this experiment as a video here:

Test the Flow of Liquids

You will need

  • 3 Glass jars (empty and cleaned)
  • 3 Marbles (cleaned and dried)
  • If you don’t have marbles, use small rocks instead.
  • Water
  • Vegetable oil, for example olive oil or sunflower oil
  • Syrup or honey
  • Cooking oil and syrup or honey can still be used or eaten after this experiment.

What to do

  1. Fill each glass jar with a different liquid at least half full. Make sure that the liquids have the same height in each jar.
  2. Drop a marble into each one and observe how fast the marble falls through the liquid inside.
  3. The slower the marble falls, the higher is the viscosity of the liquid. Which liquid in this experiment has the highest and which the lowest viscosity?

Background

It takes much longer to pour syrup into a glass than to pour water. This is because syrup has a high “viscosity”. This means that it does not flow easily. The higher the viscosity of a liquid, the slower it will flow.

You can test the viscosity of a liquid by dropping a marble into it. The slower the marble falls, the higher is the viscosity of the liquid.

You can watch this experiment as a video here:

Red Cabbage Indicator

You will need

  • 1 Sauce pan
  • 1 Chopping board
  • 1 Knife
  • 1 large glass jar
  • 4 small glass jars
  • 1 Red Cabbage
  • Vinegar, lemon juice, water and bicarbonate of soda to test

What to do

  1. Carefully chop the red cabbage leaves into small pieces on the chopping board.
  2. Put the red cabbage in a sauce pan and add water until the red cabbage leaves are completely covered.
  3. Gently boil the red cabbage for 10 to 15 minutes.
  4. After the sauce pan has cooled down, collect the water in a large jar.
  5. To better see the red cabbage water’s colour add some water to dilute it.
  6. Transfer the red cabbage water into the 4 small jars.
  7. Add a dash of vinegar to the first small jar with red cabbage juice and observe what happens.
  8. Repeat step 7 for the other substances you want to test. Each substance goes into a new small jar with red cabbage juice.
  9. What colour changes do you observe?

Background

Red cabbage juice is a pH indicator. This means it changes colour depending on if it is in an acidic, alkaline or neutral environment. In this experiment you are testing some acids (vinegar and lemon juice), some alkalis (bicarbonate of soda) and a neutral substance (water).

Which colour changes can you observe in your experiment? What colour does red cabbage indicator have in acids, bases or with neutral substances?

You can watch this experiment as a video here:

Measure the Wind

You will need:

  • Scissors
  • Glue stick
  • Thin cardboard
  • Short pencil with rubber
  • Drinking straw
  • Small plastic pot, e.g. from yoghurt
  • Pin or needle
  • Blue tag or modelling clay
  • Compass, you can just use a Compass App on your mobile phone

What to do:

  1. Make a hole in the middle of the bottom of the plastic pot using the pencil. Then push the pointy end of the pencil through the hole.
  2. Carefully cut four small triangles from the cardboard using the scissors.
  3. Glue each of the 4 small triangles to the yogurt pot. Look at the image to see where they should go. These will show the direction of the wind.
  4. Cut two larger triangles from the cardboard using the scissors.
  5. Cut a short slit at either end of the straw. Insert the two large triangles into the slits to make and arrow-shaped pointer. This is called a “vane”.
  6. Carefully push the pin or needle through the middle of the drinking straw. Then push it into the rubber on the pencil end.
  7. Make a ring from blue tag or modelling clay and push the pot firmly into it, so it cannot blow away. Your wind vane is ready to use.
  8. Place your wind vane outside. Position it so that the small triangles point North, East, West and South. Use a compass to help you. The vane swings around in the direction of the wind.

You can watch this experiment as a video here:

Architecture with Fruit Pastilles

You will need:

  • 2 Plates
  • Toothpicks
  • 1 Bag of Rowntree’s Fruit Pastilles or other gummy sweets

What to do:

  1. Place 4 fruit pastilles in a square on a clean plate and connect them with toothpicks.
  2. Place 1 toothpick in each fruit pastille, so that they stick straight up.
  3. Attach 4 more fruit pastilles to the top of each toothpick and connect them with 4 more toothpicks. You now have a fruit pastilles cube.
  4. On the second plate, place 5 fruit pastilles to form a pentagon and connect them with toothpicks.
  5. Now press 2 toothpicks into 2 neighbouring fruit pastilles, so that they come together at the top to form a triangle. Press 1 fruit pastille firmly onto both toothpick tops to finish the triangle.
  6. Repeat until you have 5 new fruit pastilles suspended over 5 toothpick triangles.
  7. Use 5 more toothpicks to connect the 5 new fruit pastilles in a new pentagon.
  8. Leave both designs overnight to set.
  9. The next day test the strength of your designs by placing books on top. Which structure can bear more weight?

Background

Architects and engineers have to think about how the parts of a building will carry stress. The weight of heavy buildings pulls on the beams holding up the buildings.

From your experiment, do you think that squares or triangles will be best for distributing stress so that a building can stay standing over a long time.

You can watch this experiment as a video here: